Background Learning
This is a small refresher on the basics of synthetic biology. Here i will try to gather all the necessory information required for the course in general.
Synthetic biology
Biology is the study of living organisms, there structural and functional parts and
how they works. Synthetic biology is a domain on top
of traditional biology which uses these studies to do real manipulation in living
organisms. Nature have evolved millions of organisms over
a long period of time and with synthetic biology we are trying to modify living
organisms in a way which is useful for us. This domain strives on the
data from biology studies.
One of the most important break through in synthetic biology was the discovery of
DNA as the blueprint for life forms. Later researches where able to
isolate parts of DNA called genes which was associated for each trait in that
organism. Another break though was the finding that genes can be
moved between organisms and can be manipulated. This has revolutionized synthetic
biology. Now we are able to identify genes coding for a specific
type of function in the cell and can be moved to into another cell of interest
eventually creating a living organism with functions and
features which we want. As the cost of sequencing and DNA synthesis continues to
drop, synthetic biology is becoming more affordable and achievable
How gene works
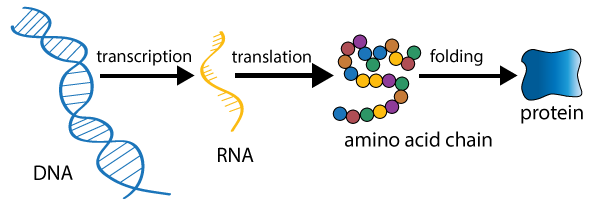
Basically a gene codes for a protein which has a structural or functional role in the cell. Often multiple genes are required for a single protein. The process is pretty much the same. DNA(gene) get transcribed into mRNA which then gets translated into amino-acid sequence which later folds itself to form the protein. Lot of enzymes are involved in this process. The production of mRNA( Messenger RNA) from DNA required RNA polymerase and convertion of mRNA to protein happens with the help of ribosomes. This whole process is called gene expression.
Parts of gene and gene expression
A complete functional gene has 4 main parts.
- Promotor: Tells the cell when to produce the protein and how much to produce. This is where RNA polymerace will bind and start creating the mRNA.
- Ribosome Binding Site: This is the place where ribosome will bind after the gene getting transcribed to mRNA. A strong RBS will enable more ribosomes to bind to the region and therefore more protein synthesis.
- Coding Sequence: The actual code for the protein. This starts with a start codon (ATG) and end with a stop codon(TGA, TAG, TAA). These codons comes handly even when we are starching to a coding sequence in a wild dna sequence.
- Terminator: This is the specific sequence which tells the RNA plymerase to stop transcribing and fall off.
Moving genes to living cells
So far we have seen how genes work and the main parts of a gene. Having a gene
does'nt do any thing. In order to make the
gene functional we need to move that inside a living organism. We often use simple
single celled micro organisms for studies
due to simplicity. One of the commonly used such host organism is e.coli. This
organism is often a popular choice because of
the small genome, quick replication cycle and easy induction process. These
organisms have something called plasmids which are
small circular DNA's beyond the full genome. There can be single or multiple
plasmids present in a single e.coli. We can use such
host organisms for cloning a gene as well as gene expression. When used for cloning
the plasmids are called cloning vector and
when used for protein expression they are called expression vectors.
The scientific community have very well studies and engineered some of these
plasmids for easy introduction of foreign genes and
selective culturing of these mutated cells. Commonly available plasmids have a set
of parts in common.
Parts of a plasmid
Their are three main functional parts of a plasmid.
- Origin of Replication : DNA squence which draws on the replication machinary of the host cell and replicate the plasmid
- Resistance marker: An antibiotic resistance gene which will help us isolate bacterial colanies which has the plasmid properly induced and functional
- Multiple Cloning sites: This is the safe place where we can introduce our dna sequences for production of particular protein. There are multiple such sites depending on the vector plasmid we are using.
The following video gives a better insight.
We don't need to understand other functions of this dna. We can simply introduce our gene and get it expressed. These concepts are pretty fundamental in synthetic biology and are called as abstraction and modularity.
Standerd Biological Parts
As synthetic biology got more and more popular, the need for a central place to
store information about
the genes studied by researches around the world started to emerge. One of the
popular gene repository is
igem which have thousands of such biological
parts.
What are biological parts ?
A biological part (or simply, part) is a sequence of DNA that encodes for a
biological function, for example a promoters or protein coding sequences.
At its simplest, a basic part is a single functional unit that cannot be divided
further into smaller functional units. Basic parts can be assembled together to make
longer, more complex composite parts, which in turn can be assembled together to
make devices that will operate in living cells. Eg: promotor, RBS etc.
Eg:
BBa_R0051 is an example of a basic part, a promoter regulated by lambda cl.
We can combine thes basic parts to create composite parts.
Eg: BBa_I13507 is an example of a composite part, consisting of a rbs, protein
coding region for a red fluorescent protein, and terminator.
When a composite part is complete enough to conduct an operation in the cell then it
is called as a device.
Eg: BBa_I763007 is an example of a device, which uses BBa_R0051 and BBa_I13507, to
regulate production of red fluorescent protein in cells with lambda cl.
Each Biological part in the registry has a unique name starting with 'BB'
More details at igem website
Standardization is key for such biological parts so that it can be used widely
amoung a larger community and the results are reproducible.
One of the popular standardisations used in this repository is called biobricks.
Refer the
video to understand how it works.
In this week we are starting to get the real feel of synthetic biology. This week we learn how DNA works in a living cell and as a first step in manipulating DNA we will learn restriction enzymes as a tool to cut DNA at specific sites.
Lab Task
Verify restriction digest of a circular DNA plasmid by gel electrophoresis. Compare your experimental result with what you would predict from the plasmid map.
PUC19 plasmid
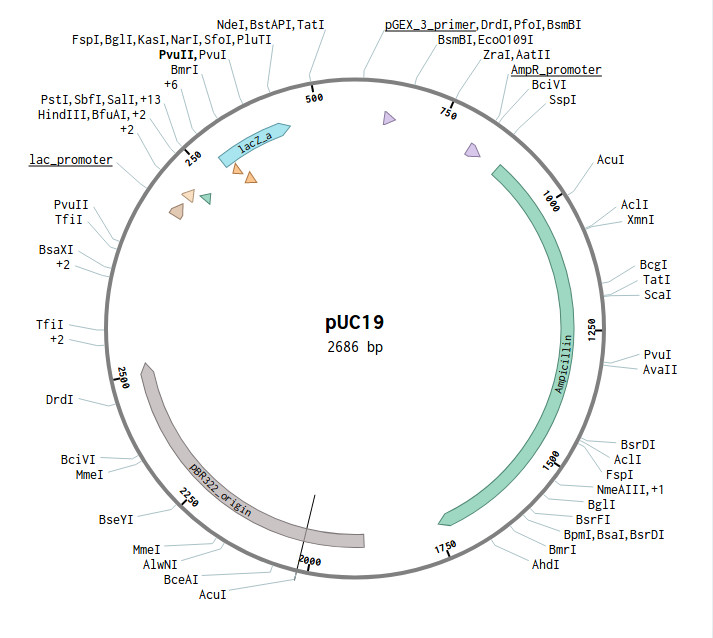
This is the puc19 plasmid with all the importent sites annotated. I am using benchling for viewing and studying the plasmid. The plasmid map is from addgene. The following image shows the PVUll cut sites
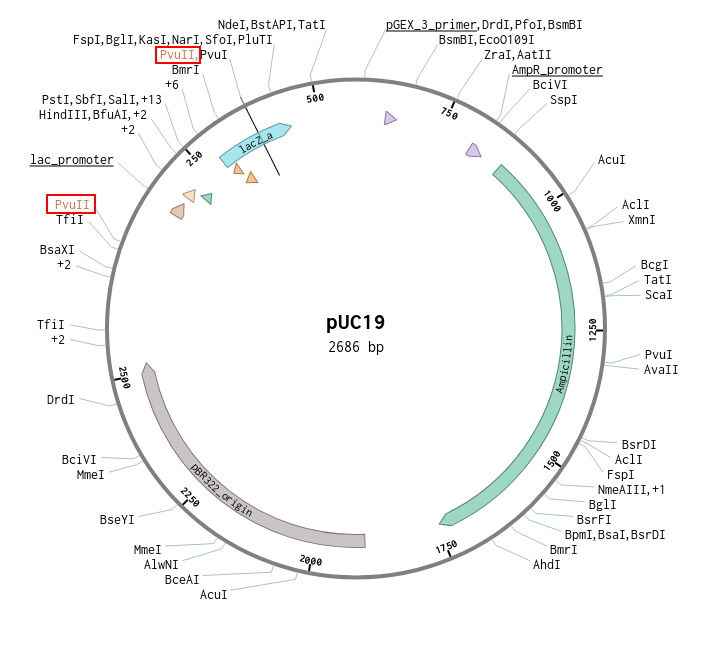
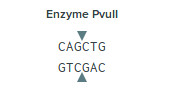
There are two cut sites for the restriction enzyme Pvull-HF they are at location 55 and 377 in the particular plasmid map. This particular enzyme cuts at the following region and sequence.
As the enzyme cuts at two sites it leaves behind two dns sengments of the following properties

Separating the fragments
We can use the gel electrophoresis method to separate the DNA fragments. This method
works on the property that DNA is negatively charged and the amount
of charge depends on the size of the DNA. But larger DNA has more size and is
difficult for it to move through the pores in the aragose medium. Thus when we
run the electrophorosis smaller DNA will be found closer to the positive plate and
larger ones nearer to the negative plate and others in between.
Alongside we also run the same experiment with a set of dna fragments of known size.
Thus we get a pattern which can be used as reference for the separation of
the unknown samples with their molecular weight.
Protocol
- The following wetwares/reagents with respective volumes where used for the experiment
- Now take one 1.5 ml eppendrof tubes and add the above reagents in the order : water, Buffer, enzyme, plasmid. Always make sure to add the buffer before adding the enzyme else there are chances for denaturing.
- The total volume of 75 ul was seperated into two tubes with 30 ul each. One of the tubes where kept at 4 degree and the other at 37 degree celsius.
- 0.5g agarose was added to 50ml water to prepare 1% agarose solution. Later the mixture was heated in oven for 90 seconds to melt the agarose. After the solution cooled (before setting) 5ul of Nancy-520 was added to it.
- This solution was pured to the gel tray and was allowed to set.
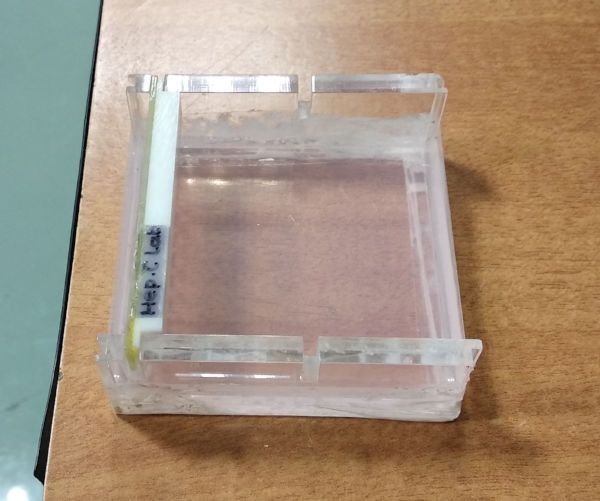
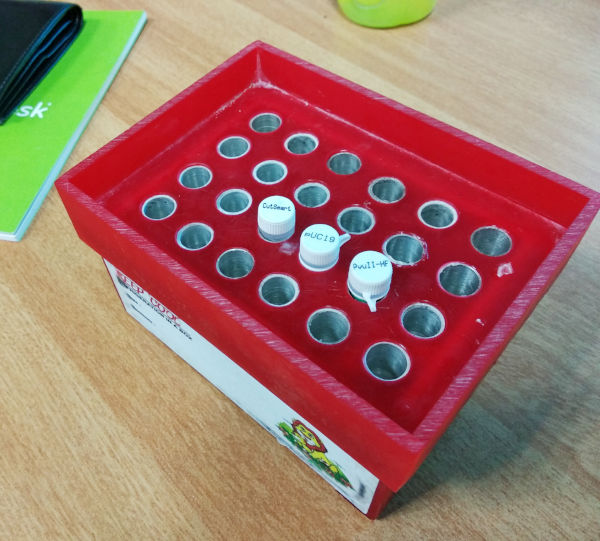
- After setting the comb was removed and samples in the following order where added to the wells. Unrestricted plasmid, restricted plasmid at 37 degree celsius, restricted plasmid at 4 degree celsius, dna ladder. Before adding the samples where stained with ethedium bromide dye.
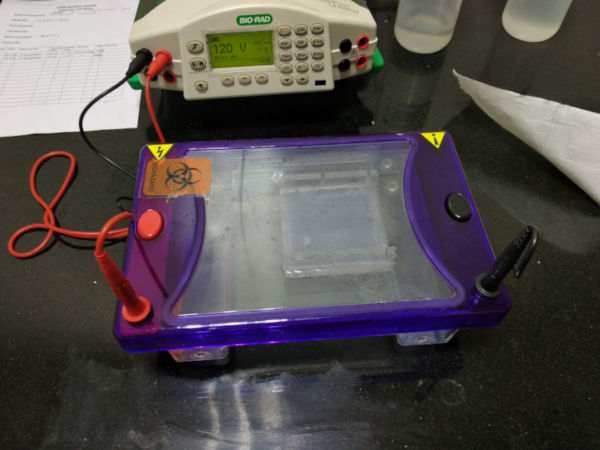
- 1X 1l TAE Buffer was prepared from the existing 50X TAE Buffer. TAE buffer was added electrophoresis apparatus and the gel was added to it. Enough buffer was added so that the gel is fully immersed in it.
- Run the electrophoresis at 120V for 1.5 hours.
- After running the experiment for 1.5 hours we can see that the samples have moved from their respective positions.
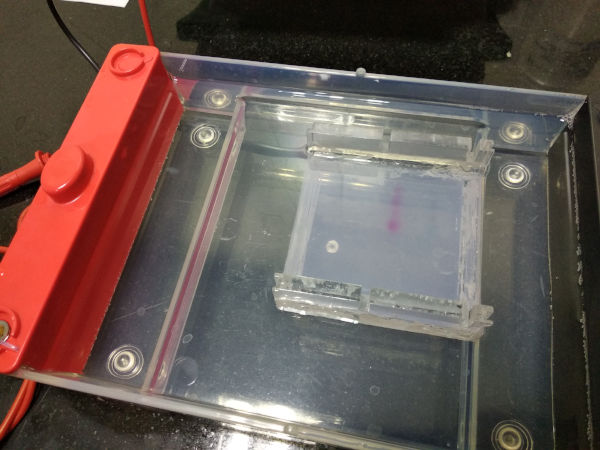
- Image DNA separation over a blue-LED transilluminator.
| Item | Vol to Rx |
|---|---|
| pUC19 | 5 ul |
| PvuII-HF | 2.5 ul |
| Cutsmart Buffer (10x) | 7.5 ul |
| Deionized Water | 60 ul |
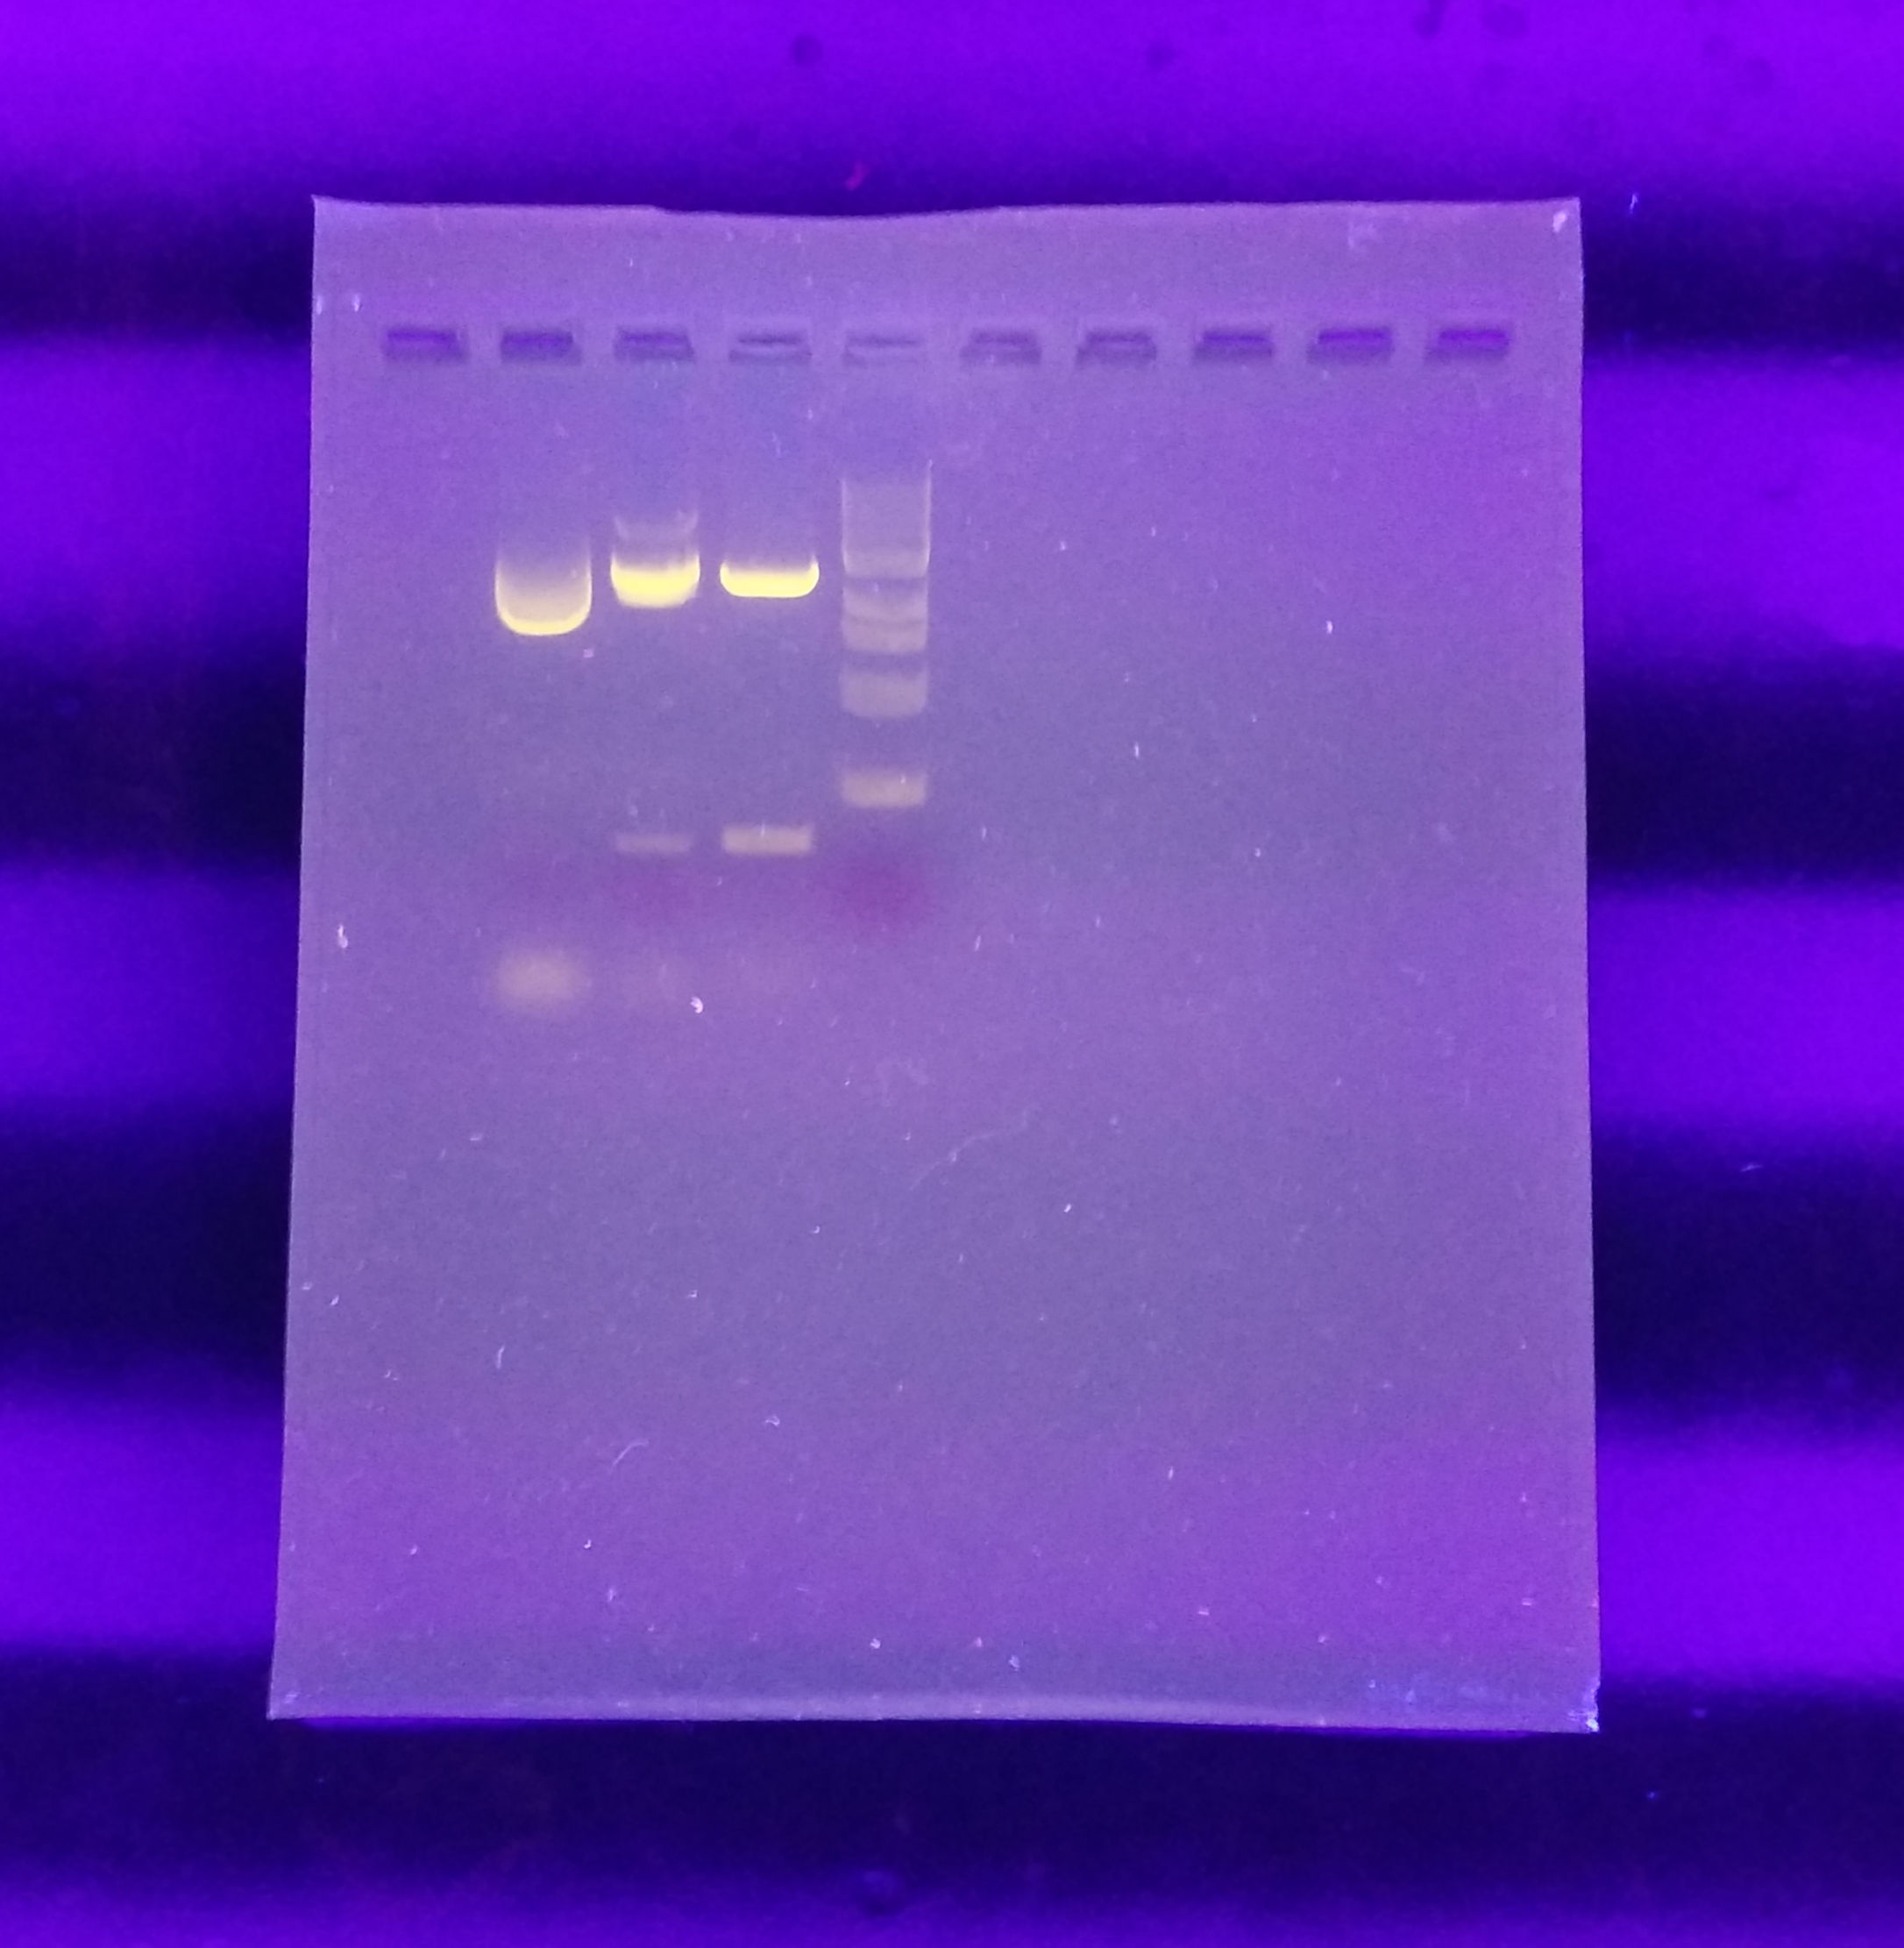
Results
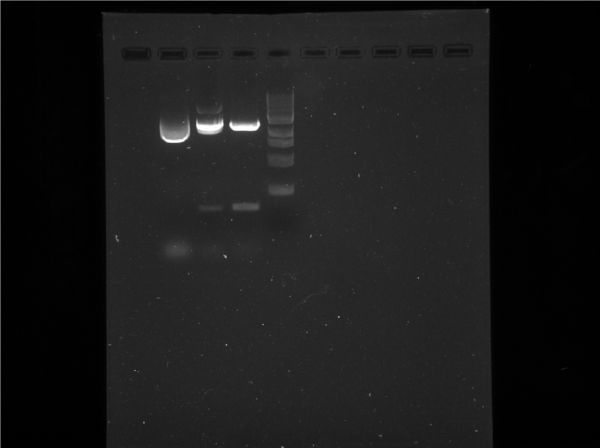
The above was the result of imaging the gel using the BIORAD Gel Doc device with Image Lab Software
Conclusion
The results from the gel electrophoresis confirmed our predictions from the the plasmid map analyzis.
Theory Task
Choose a DNA sequence that interests you from nature or a source like the iGEM part registry. Provide a detailed workflow for isolating or acquiring a molecule with this specific sequence and an assay that confirms part of its content.
I am selecting pbrR coding sequence for my theory assignment.
This sequence code for the protein PbrR which is a lead specific-binding protein
from Cupriavidus metallidurans CH34. I as
selecting this protein because my plan for
the final project is to make a microbial biosensor for lead and other heavy metals.
This part is available in igem.
This sequence is a part of Lead resistance operon from Cupriavidus metallidurans
CH34.
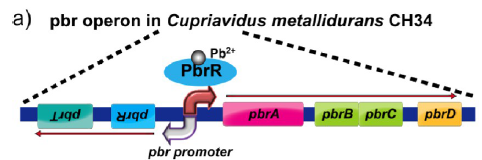
The PbrR protein specifically binds to lead ions and activates the pbr promotor
in the gene. This can be engineered to express bioluminance proteins rather than the
actual ones in the organism
to achieve biosensing of lead.
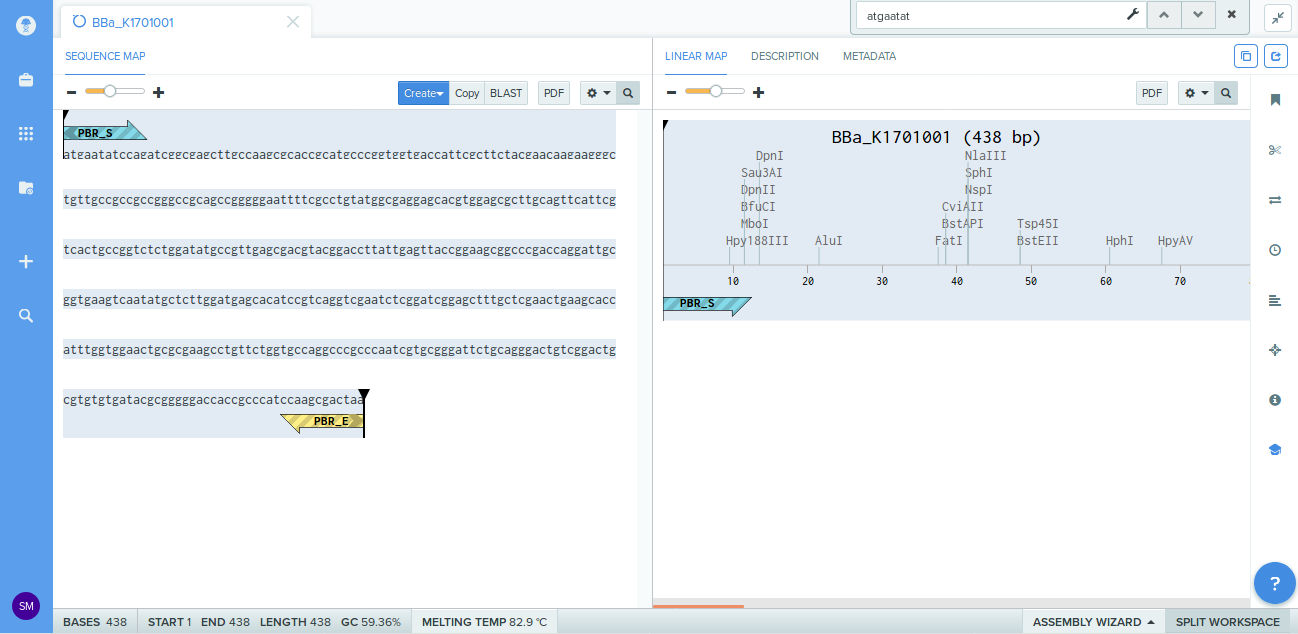
The DNA sequence
atgaatatccagatcggcgagcttgccaagcgcaccgcatgcccggtggtgaccattcgcttctacgaacaagaagggctgttgccgccgccgggccgca
gccgggggaattttcgcctgtatggcgaggagcacgtggagcgcttgcagttcattcgtcactgccggtctctggatatgccgttgagcgacgtacggac
cttattgagttaccggaagcggcccgaccaggattgcggtgaagtcaatatgctcttggatgagcacatccgtcaggtcgaatctcggatcggagctttg
ctcgaactgaagcaccatttggtggaactgcgcgaagcctgttctggtgccaggcccgcccaatcgtgcgggattctgcagggactgtcggactgcgtgt
gtgatacgcgggggaccaccgcccatccaagcgactaa
Isolating sequence of interest
The gene of interest is from the organism Cupriavidus metallidurans CH34. First we
need to culture the organism, then the
dna need to be seperated from the organism. The following is a procedure for
seperating the dna from the organism.
- 1. Collect the Cupriavidus metallidurans CH34 cells
- 2. Crush the cells in a mortar to release all the DNA
- 3. Use centrifugation to separate DNA and proteins from cell derbis
- 4. Precipitate proteins by adding excess salt so that DNA will be suspended in the solution and can be separated.
- 5. Centrifuge again to remove settled protein
- 6. Add isopropyl alcohol to precipitate dna in the solution
- 7. Centrifuge again to separate the dna which clumps at the bottom
I am using benchling for developing the primers for the PCR. The following is a video tutorial which helps you do this.
The following are the primers which i have designed to isolate this particular gene.
5' ATTCCAGCTGATGAATATCCAG 3'
5' TATACAGCTGTTAGTCGCTTGG 3'
The procedure for PCR is as follows.
- 1. Place the previously extracted DNA in a PCR tube
- 2. Add primers to the tube
- 3. Add DNA polymerase followed by the nucleotides
- 4. Place the tube in the thermocycler and program it accordingly
After around 20-30 cycles, the gene of interest will be of maximum concentration. This can be isolated by gel electrophoresis as in the practical experiment.
Assay to confirm the sequence
We can use the same gel electrophoresis with a control dna samples to estimate the length of base pairs in our sysnthesysed dna sequence. This can be compared with the actual count to confirm the assay.
Ethics/ safety considerations this week
Do your activities this week raise new ethics and/or safety considerations you had not considered in week 1? Describe what activities have raised these considerations and any changes you have implemented in response.
This week we dealt with Ethedium bromide which is a carcinogenic dye used to labeling DNA in gel electrophoresis. This chemical should be handled and disposed very carefully.